I went down for my first visit since the restoration began on Monday. I wanted to be involved in the some of the restoration as I said. However, a 5 hour one-way drive is painful. So I may not be able to do this very often. I spent the day down there armed with a wire air brush and a lot of sand paper and cleaning supplies.
Engine cleaning 101:
#1: This will take more than 1 day. Be patient and take your time if you want great results. I would only have time to knock off the heavy grime and some of the old paint which was plentiful...
#2: Have the right equipment. Here is a list but it is certainly not an all inclusive list.
An air tool (Dremel type with wire brush attachment). See below picture.
60/120/320 grit sandpaper.
A spray on degreaser (gunk etc)
Airplane paint stripper (its in a spray can)
Hand held wire brushes
A scotch bright Brillo pad type attachment. This will help strip the last layer of paint
A scraper type tool. (basically a wide-body razor blade attached to a handle).
A air blower attachment. Looks like a gun that shoots compressed air, like your dentist has.
High pressure power washer
#3 Although this may be obvious, but wear a jump suit of some kind or overalls. Shit gets messy. I looked like movie Zoolander after he was working in his father's mines by the end of the day. You may want to bring a change of clothes as well, otherwise you drive back for 5 hours feeling like you were laying at the bottom of a swamp all afternoon.
#4 Any screws/bolts you remove, you should keep them in one box and possibly label them. Some are longer and different thread patterns. You don't want to do a kickass job only to strip out a screw/bolt socket after trying to thread the wrong screw or bolt back in.
Side note: I decided to remove the fenders myself. Fairly easy task even for one person, but it is much easier with two. The first one Noah and I removed but I removed the second one myself. To remove the fenders. There ten 1/2" bolts. You can make life easy on yourself if you have an air driven ratchet wrench and a 1/2 " long socket. Other wise there will be awkward angles to get leverage with. Start with the top 5 along the engine compartment. #6 & 7 are two in the front headlight bucket. #8 is on the bottom of the fender where the fender meets the bottom of the door section. #9 is in the door jam about halfway up. The 10th and last is inside the vehicle under the drivers side door and the passenger side door, about where the parking brake/or hood release latch would be in most other cars. It will be in the same general location on the passengers side. There is a rubber seal stopper over the hole you will need to pry out. This one is the tricky one because you have to get the socket in place first then attach the wrench because the nut has paint on it and fits very very snug. Once you get that last bolt off the panel will pull of fairly easily. It can be done by one person, as I have done, but it is much easier with two. As you start removing the bolts it will seem that they are not coming out. They are, but because they are held in place by metal fasteners it will seem like they are just spinning. I assure you they are not. Be Careful not to pop the fasteners off since they may fall into the door jam.
#4 Start with the scraper and then the wire brush. This will help knock off the heavy stuff that the degreaser will have trouble penetrating. If you use the degreaser first you will have a mess that will spray everywhere when you use the air brush attachment. After you get the heavy stuff off you can spray down the engine bay with the gunk cleaner then use the pressure washer. Obviously do this somewhere outside if possible due to the grease, oil and grime that will wash down.
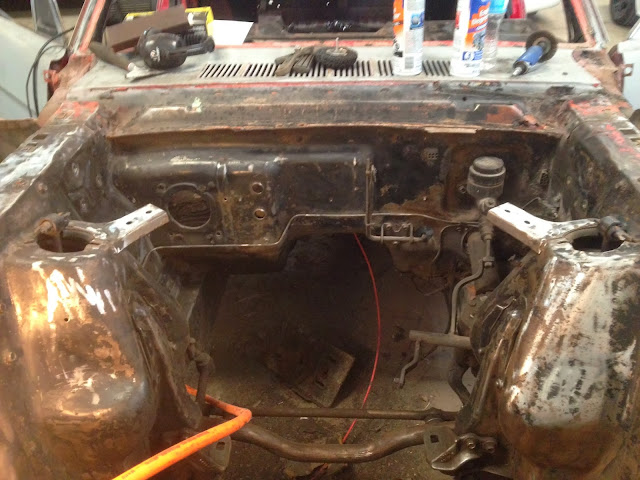
#5 Let it dry and then use the airplane stripper. After that penetrates and begins dissolving you can use the pressure washer again to get as much paint as you can off. Once that dries use the Brillo attachment to remove the final bits of paint. Then its time to get on with the suck portion of the job. Begin with lowest grit sandpaper and work your way up. When you have an even smooth surface you will be ready to paint. Below is the first picture right after the engine was pulled. The next ones are after the wire brush but before the degreaser and paint stripper were used. I ran out of time, so the boys at PMP will finish it up. Should be ready for paint right after Christmas break. They will be using a high heat black gloss paint. It will look awesome with the blue engine block, chrome valve covers, chrome air cleaner and the polished serpentine drive belt pulleys.
I hope this helps any first timers. There are plenty of videos and other articles on the web, both restoring with the engine in and with it out. I will say this, if you really want a great engine bay you need to pull the engine and really break everything down.
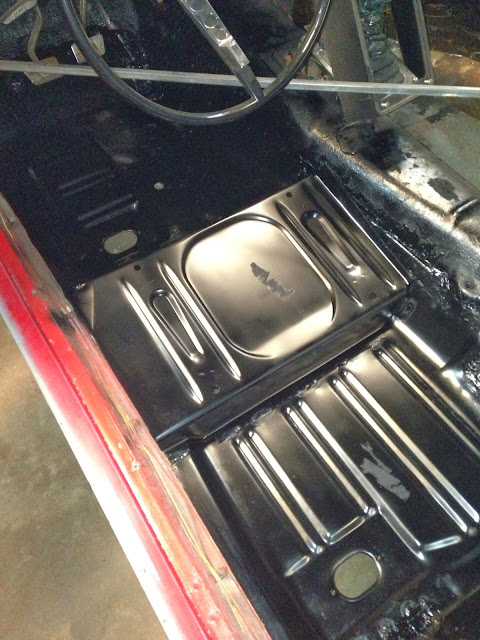
I also included pictures of the floor pan replacement. I will cover that in a later blog.


No comments:
Post a Comment